One of the most common questions we get from customers building out their car or bike isn’t about which product to buy — it’s whether they can install it themselves. The honest answer varies a lot by part. Here’s a practical, part-by-part breakdown to help you decide where your own toolkit is enough, and where it’s worth paying a professional.
Good DIY Candidates
These mods generally require basic tools, a bit of patience, and no specialized equipment:
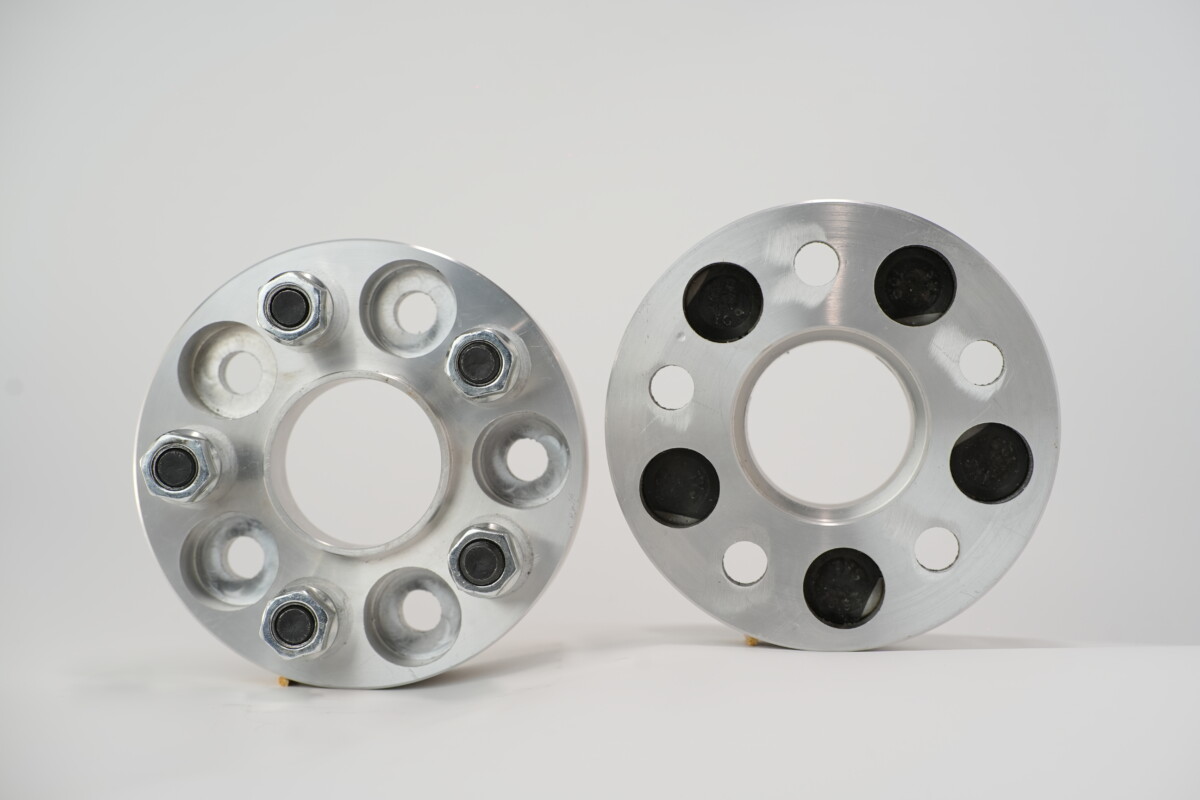
- Wheel spacers — installation is essentially the same process as changing a tire, with the spacer sitting between hub and wheel. The main requirement is a torque wrench to hit the correct spec, and ideally a re-torque check after the first 50–100 km.
- Direct-fit LED bulb replacements — plug-and-play swaps into the existing headlight or tail light housing, no wiring changes needed in most cases.
- Floor mats, seat covers, and trunk mats — zero mechanical risk, purely a fit-and-place job.
- Steering wheel and gear knob replacements — usually a few bolts and a wiring harness connector (for airbag/horn contacts on the steering wheel), well within reach of anyone comfortable with basic hand tools and a service manual.
- Nut and bolt cover caps, small trim pieces — purely cosmetic snap-fit components.
- Paddock spools and swing arm protectors (bikes) — typically bolt directly into existing threaded mounting points.
Proceed With Caution
These are within reach of an experienced DIYer, but the margin for error is smaller, and mistakes can be expensive or unsafe:
- Front lips and side skirts — usually just clips and a handful of bolts, but panel alignment matters for a clean look, and rushing the job often shows in uneven gaps.
- Full LED headlight housing replacements — more involved than a bulb swap, sometimes requiring bumper removal and wiring harness work, plus attention to beam alignment afterward.
- Aftermarket seats — installation itself is usually straightforward bolt-in work, but compatibility with factory seat rails, seatbelt sensors, and airbag wiring needs to be verified carefully beforehand.
Best Left to a Professional
These jobs either require specialized equipment, carry real safety implications if done incorrectly, or both:
- Full body kits — bumper removal often involves disconnecting sensors, fog lights, and sometimes headlight washers hidden behind the bumper cover. Getting panel gaps consistent across a full kit is a skill that takes practice.
- Paint matching and painted body components — this genuinely requires a professional booth, proper color-matching equipment, and clear-coating experience to avoid a visible mismatch.
- Anything involving suspension geometry changes — while not covered in most basic mod kits, any modification that changes ride height or suspension geometry should be followed by a professional wheel alignment.
- Engine tools and precision machining equipment (like valve seat grinding machines) — these require both the specialized equipment itself and the technical knowledge to use it correctly; this is squarely professional workshop territory, not a driveway project.
General Rules Worth Following, Regardless of the Job
- Always use a torque wrench for anything involving wheels, suspension, or structural bolts — “tight enough by feel” is not a substitute for the manufacturer’s specified torque value.
- Check your vehicle’s service manual before disconnecting anything electrical, particularly around airbags and safety sensors.
- Budget for a wheel alignment after any mod that changes ride height, track width, or suspension components.
- When in doubt, ask first — a quick question to the supplier or a trusted mechanic before starting is much cheaper than fixing a mistake afterward.
Building a Basic DIY Toolkit
For the “Good DIY Candidates” category above, a modest toolkit covers the vast majority of jobs:
- A quality torque wrench covering the range needed for wheel and interior bolt specifications — this is the single most important tool for anyone doing their own wheel or spacer installations.
- A basic socket set with both metric sizes commonly used across most vehicles.
- A trim panel removal tool set — inexpensive plastic pry tools that prevent cracked clips and scratched panels when removing interior trim or door cards.
- A digital tire pressure gauge, useful any time wheels come off and go back on.
- Your vehicle’s service manual or a reliable model-specific guide, particularly for anything involving airbag or safety-system wiring.
Signs a Job Has Gone Beyond DIY Scope
Even starting with good intentions, some jobs reveal complications partway through that are worth recognizing as a signal to call in a professional rather than push forward:
- Discovering rust, corrosion, or damaged threads on fasteners that weren’t visible before starting.
- Wiring connectors that don’t match what your reference guide described, suggesting a previous modification or a running change your vehicle’s model year doesn’t reflect in the documentation you’re using.
- Any point where continuing would require cutting, drilling, or otherwise permanently altering factory components without being confident in the outcome.
- Warning lights or fault codes appearing after reconnecting electrical components — this is the moment to stop and get a professional diagnosis rather than keep troubleshooting by trial and error.
There’s no shame in starting a job yourself and handing it off partway through — the money saved on the portion you completed is still money saved, and it’s far better than pushing through uncertainty on something safety-related.
Cost Considerations: DIY Savings vs Professional Peace of Mind
The financial case for DIY is straightforward for low-risk jobs — you’re mainly saving on labor cost for work that takes an experienced technician only marginally less time than it would take you. The calculation shifts for higher-risk jobs: a botched DIY paint match or a body kit installation with visible gaps often costs more to correct afterward than it would have cost to have done professionally in the first place. A useful mental framework is asking: “If this goes wrong, what does it cost to fix, and could I have prevented that by paying a professional upfront?”
Working With a Professional: Getting the Best Result
When you do decide to use a professional installer, a few habits improve the outcome:
- Buy quality parts yourself and bring them to a trusted installer, rather than relying on whatever the shop happens to stock, if you’ve already researched a specific product you want.
- Ask to see examples of similar work they’ve completed, particularly for body kit and paint-matching jobs where finish quality varies significantly between shops.
- Get a clear estimate of both cost and timeline before work begins, including what happens if unexpected complications are discovered.
Final Thoughts
Most cosmetic and bolt-on performance parts are genuinely accessible to a confident DIYer with basic tools and a bit of patience. The dividing line is usually whether a mistake is merely cosmetic (fixable) or safety-related (not worth the risk). When a job touches your car’s structure, electronics, or safety systems, that’s the moment to hand it to a professional — and recognizing that line partway through a job is just as valuable as recognizing it beforehand.